【WordPressのカスタム】
プラグイン不要!ユーザー情報を活用したプロフィール一覧の作り方
WordPressには、複数のユーザー情報を扱う機能が標準で備わっています。今回は、プラグインを使わずに、カスタムコードを利用して、ユーザー情報をもとにしたプロフィール一覧を表示する手順を紹介します。コードに慣れている方であれば、自由にカスタマイズすることが可能です。完成形

事前準備(こちらのカスタムを先に行ってください)
HTML & PHP コード
事前準備で作成したカスタムテンプレート"My Custom Page"(custom-page.php)の”get_header(); ?>”の下に下記のコードをコピペしてください。
get_header(); ?>

<!-- ペーストする関数はこちら -->

<div id="wrapper">
    <main>
        <?php
        while (have_posts()) : the_post();
            the_content();
            // スタッフ紹介のタイトル
            echo '<section class="staff-intro-section">';
            echo '<h2>スタッフの紹介</h2>';
            echo '<p>私たちの素晴らしいスタッフを紹介します。</p>';
            echo '</section>';
        endwhile; // End of the loop.
        ?>
    </main><!-- #main -->
</div><!-- #wrapper -->

<!-- スタッフのプロフィールカード表示セクション -->
<div class="staff-profile-section">
    <div class="beigeBox">
        <div class="main1">
            <div class="consultantBox">
                <?php if(have_posts()): while(have_posts()): the_post(); ?>
                    <?php the_content(); ?>

                    <!-- 投稿者一覧を表示('exclude' => [1, 2, 3, 10])表示させたくないユーザーID番号 -->
                    <?php
                    $users = get_users([
                        'orderby' => 'ID',
                        'order' => 'ASC',
                        'exclude' => []
                    ]);
                    ?>
                    <div class="writers">
                        <?php foreach ($users as $user): ?>
                            <?php
                            $uid = $user->ID;

                            // 各ユーザーメタデータを取得
                            $hobby = trim(get_the_author_meta('hobby', $uid));
                            $food = trim(get_the_author_meta('food', $uid));
                            $birthplace = trim(get_the_author_meta('birthplace', $uid));
                            $description = trim(get_the_author_meta('description', $uid));
                            ?>

                            <div class="writer-profile" id="writer-profile-<?= esc_attr($uid) ?>">
                                <!-- 隠し要素に趣味、好きな食べ物、出身地を格納 -->
                                <input type="hidden" id="hiddenHobby-<?= esc_attr($uid) ?>" value="<?= esc_attr($hobby) ?>">
                                <input type="hidden" id="hiddenFood-<?= esc_attr($uid) ?>" value="<?= esc_attr($food) ?>">
                                <input type="hidden" id="hiddenBirthplace-<?= esc_attr($uid) ?>" value="<?= esc_attr($birthplace) ?>">
                                <input type="hidden" id="hiddenDescription-<?= esc_attr($uid) ?>" value="<?= esc_attr($description) ?>">

                                <!-- ユーザープロフィール表示 -->
                                <figure class="eyecatch">
                                    <?= get_avatar($uid, 190) ?>
                                </figure>
                                <div class="profiletxt">
                                    <p class="name"><?= esc_html($user->display_name) ?></p>

                                    <div class="hobby">
                                        <span class="label">趣味: </span><?= !empty($hobby) ? esc_html($hobby) : '情報なし' ?>
                                    </div>
                                    <div class="food">
                                        <span class="label">好きな食べ物: </span><?= !empty($food) ? esc_html($food) : '情報なし' ?>
                                    </div>
                                    <div class="birthplace">
                                        <span class="label">出身地: </span><?= !empty($birthplace) ? esc_html($birthplace) : '情報なし' ?>
                                    </div>
                                    <div class="description">
                                        <span class="label">コメント: </span><?= !empty($description) ? esc_html($description) : '情報なし' ?>
                                    </div>
                                </div>
                            </div>
                        <?php endforeach; ?>
                    </div>
                    <!-- 投稿者一覧表示終了 -->

                <?php endwhile; endif; ?>
            </div>
        </div>
    </div>
</div>

 <!-- ペーストする関数はここまで -->

<?php get_footer(); ?>
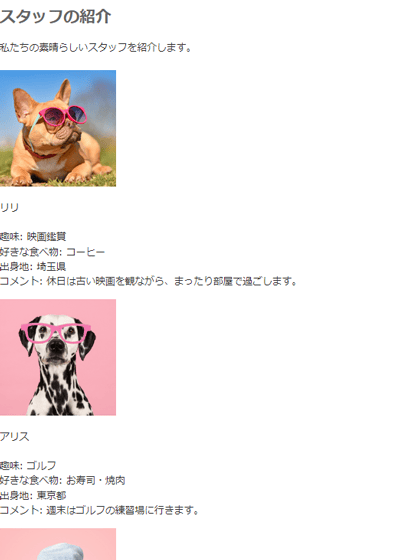
HTML & PHP コード設定後の画面
CSS コード
スタッフ紹介セクションをスタイリッシュにするCSSを提供します。視覚的に良くするために、カード形式のデザイン、ホバーエフェクト、フォントスタイル、スペーシングを加えてみました。
/* スタッフ紹介セクションのスタイル */
.staff-intro-section {
    text-align: center;
    margin-bottom: 40px;
}

.staff-intro-section h2 {
    font-size: 2em;
    color: #333;
    margin-bottom: 10px;
}

.staff-intro-section p {
    font-size: 1.2em;
    color: #666;
    margin-bottom: 20px;
}

/* スタッフプロフィールセクションのスタイル */
.staff-profile-section {
    background-color: #f9f9f9;
    padding: 20px 0;
}

.beigeBox {
    background-color: #f5f5dc;
    padding: 20px;
    border-radius: 8px;
}

/* 投稿者一覧のコンテナ */
.writers {
    display: flex;
    flex-wrap: wrap;
    gap: 20px;
    justify-content: space-between;
}

/* 各プロフィールのスタイル */
.writer-profile {
    width: calc(33% - 20px);
    background-color: #fff;
    padding: 20px;
    border: 1px solid #ddd;
    border-radius: 8px;
    box-shadow: 0 2px 5px rgba(0, 0, 0, 0.1);
    transition: transform 0.3s ease;
}

.writer-profile:hover {
    transform: translateY(-5px);
}

/* ユーザー画像 */
.eyecatch {
    display: block;
    text-align: center;
    margin-bottom: 15px;
}

.eyecatch img {
    border-radius: 50%;
    width: 120px;
    height: 120px;
    object-fit: cover;
}

/* ユーザー情報テキスト */
.profiletxt {
    text-align: center;
}

.name {
    font-size: 1.2em;
    font-weight: bold;
    margin-bottom: 10px;
    color: #333;
}

.hobby, .food, .birthplace {
    margin-bottom: 8px;
    font-size: 0.95em;
    color: #666;
}

/* ラベルのスタイル */
.label {
    font-weight: bold;
    color: #444;
}

/* レスポンシブ対応 */
@media (max-width: 768px) {
    .writer-profile {
        width: calc(50% - 20px);
    }
}

@media (
プログラムの解説
1. 投稿コンテンツの表示部分
◎ have_posts(): この関数は、WordPressが表示する投稿があるかを確認します。もし投稿があれば、 true を返します。
◎ the_post(): この関数で、次の投稿データを取得し、準備します。1つの投稿のデータを処理する準備をする際に使います。
◎ the_content(): 投稿の **本文(コンテンツ)**を表示します。
2. プロフィールカードセクション
◎ get_users():WordPressに登録されている 全ユーザーの情報を取得します。この関数では、いくつかのオプションを指定できます。
◎ orderby: ユーザーを並べる基準です。ここでは ID順に並べています。
◎ order: 昇順(ASC)にする指定。
◎ exclude: 特定のユーザーIDを除外できますが、ここでは除外していません。
3. 各ユーザーのデータ取得
◎get_the_author_meta():WordPressユーザーに関する カスタムフィールドのデータ(趣味、好きな食べ物、出身地、コメント)を取得する関数です。
◎各ユーザーごとの ID ($uid) を使って、ユーザーデータベースからこれらのカスタムフィールドを取得しています。
◎trim():データの前後に余計な空白があれば取り除きます。
4. プロフィール表示部分
◎ esc_attr():HTML属性として使う場合に、文字列が安全になるようエスケープ処理を行います。ここでは、ユーザーIDが正しくHTMLで扱われるようにしています。
◎ get_avatar():WordPressのユーザーに紐づいた アバター画像(プロフィール画像)を取得します。190は画像のサイズ(190px)。
◎ esc_html():ユーザーの名前や趣味などの データをHTML出力用にエスケープ処理して安全に表示します。
5. 投稿者一覧表示の終了
◎ endwhile と endif は、PHPのループと条件分岐の終了部分です。これで、投稿ループとユーザー情報の表示処理を終了させています。
まとめ
投稿の内容を表示しつつ、登録ユーザーのプロフィール情報を一覧形式で表示するためのコードです。get_users()で取得したユーザーのカスタムメタデータ(趣味、好きな食べ物など)を使い、アバター画像と共に表示します。